So I did some modification here, for two reasons, which I will get into in this post, but first:
Storytime again!
So, the first year that I rode down with John Shelton in his Hurricane cobra to the TCC Spring Meet in San Marcos, I was still in the evaluation stage and hadn't made the commitment yet. Well, John drives his cobra up my driveway already loaded with his luggage and stuff, I have my gym bag and backpack ready for the long weekend, he opens the truck and -- the wife (SWMBO) exclaims: "What?! This is all the truck space there is? How will I fit all my luggage and shopping spree packages in OUR cobra?!?" Harrumph.. I dont know, dear! Well, I stuffed my bag in the 2 sq ft left over in the trunk, stuffed my backpack in the passenger floor between my knees, and strapped in for the 220 mile drive to San Marcos.
But thinking about that, I remember seeing some cool pictures of cobras pulling little utility trailers, some shaped like cobra asses (which was cool), some generic motorcycle-style trailers, but with enough space to drag SWMBO's stuff behind us. So I decided then and there I would figure out some kind of trailer hitch set up for the long romantic road trips we will be enjoying in our Golden Years .... ahhhh.. more on the trailer hitch idea in the next post.
The second reason for this fuel tank mod showed itself when we got to San Marcos and I saw the new Hurricane factory demo car. The new aluminum fuel tank, which would now be standard on the new 2nd gen kits from Iowa, really protruded too far below the body for my eyes. I didn't like how it looked. Hmm... what to do.
So here we go!

 Here we have a picture of my tank temporarily sitting in place. Notice how low it is under the rear frame. Now I don't have any pictures I can find with the trunk tub on frame, but I did notice with the trunk tub in place that there was a good two inches of air space between the floor of the trunk, and the top of the tank. Plenty of room to move it up!
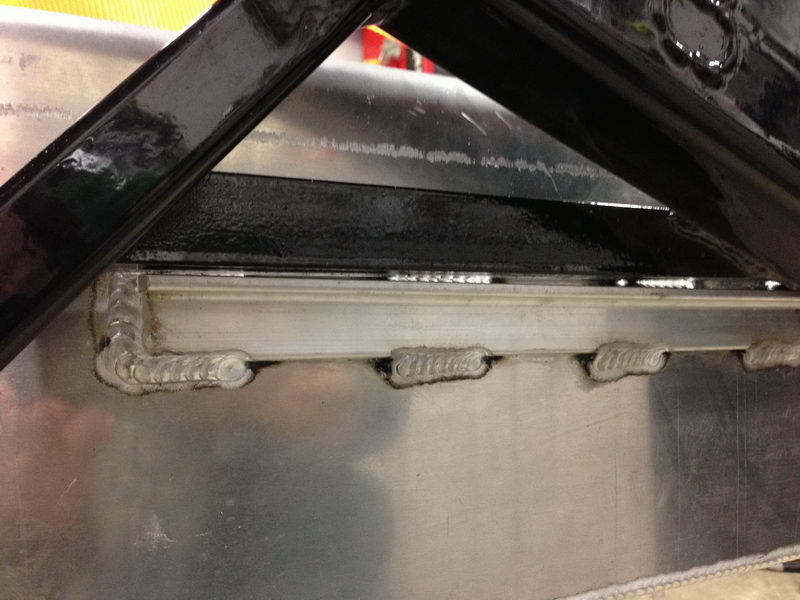
The tank is designed to be installed from below (so you can remove it if you need to later, I suppose), with aluminum L-brackets welded on the tank that is to be bolted to a steel L-bracket on the frame.

So I simulated moving it upward by dropping it in from the top, spacing it up with some wooden shims, and then sitting the trunk tub on. Lots of air space left! Winning!
So, not only did I want to move the tank up, I also want to move it more forward to 1). Hide it under the car more, and 2). make space for hidden trailer hitch! (next post).
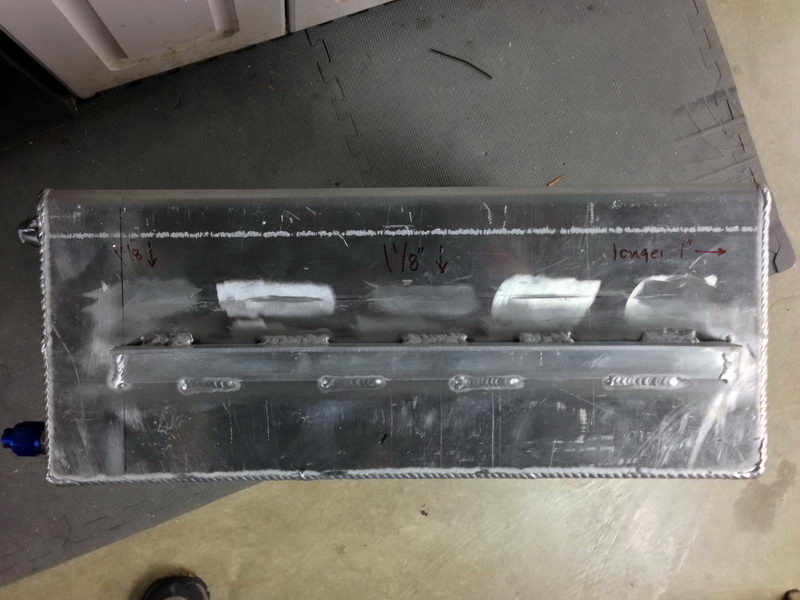
So I marked the tank to move the aluminum L-bracket DOWN 1-1/8" (effectively moving the tank upwards), and making the bracket 1" longer so it can slide the tank forward an inch, with just enough space left between the tank and the rear suspension panhard bar.
I took the tank to MC Auto Creations in Ovilla, Texas. Aaron Chovanetz and his guys are wizards with aluminum; I wouldnt trust it with anyone else. They did a superb job, just to my specifications.
Before and After:

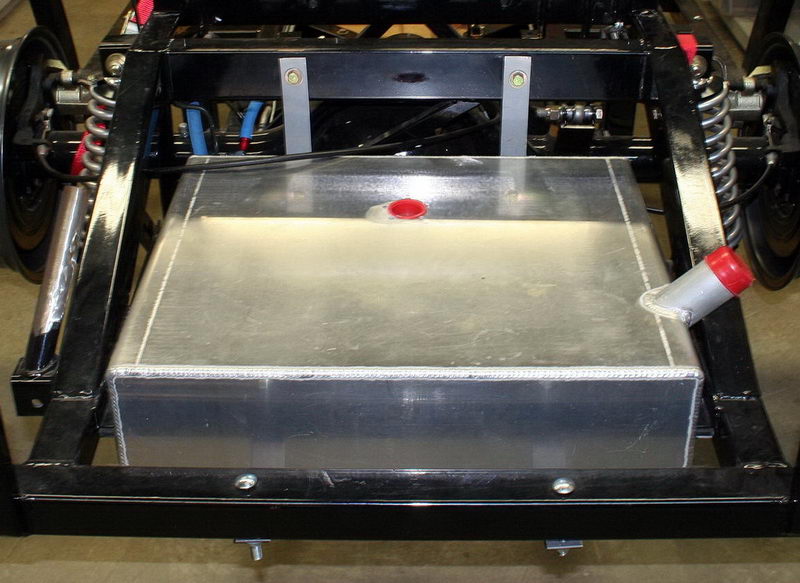
With the body installed, the tank can barely be seen poking out from behind. Victory!
Resources: